Simply because it’s awesome, I thought I would write a blog about the AirCheck G2. It’s my favorite WiFi diagnostics tool, hands-down. It does so many things in such a small, rugged form factor that it’s impossible not to love. As soon as I first saw it, I knew NetScout had a winner – and I told them so. The original AirCheck was and still is an awesome tool. If you have one, use it. That said, the G2 is even better.
There’s a really neat G2 simulator here:
http://enterprise.netscout.com/aircheck-g2-demo
Here are the 7 features I love most about it (though admittedly I love practically everything about it) and how I use them.
Not in any particular order:
1. Channels screen
From the home screen, just click Channels. It’s that simple.
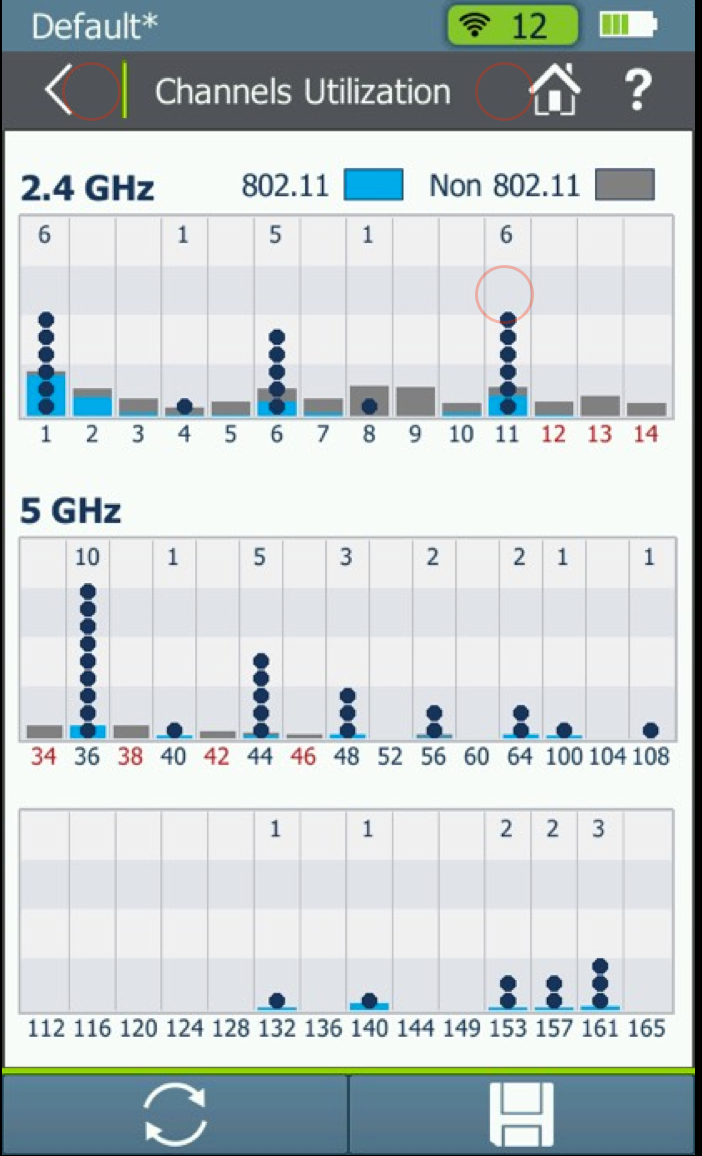
This screen spews WiFi goodness. I use it more than any other screen. It shows me CCI, ACI, WiFi and non-WiFi interference, and channel utilization all at the same time, in one screen. What’s not to love?
2. AP & Client Information
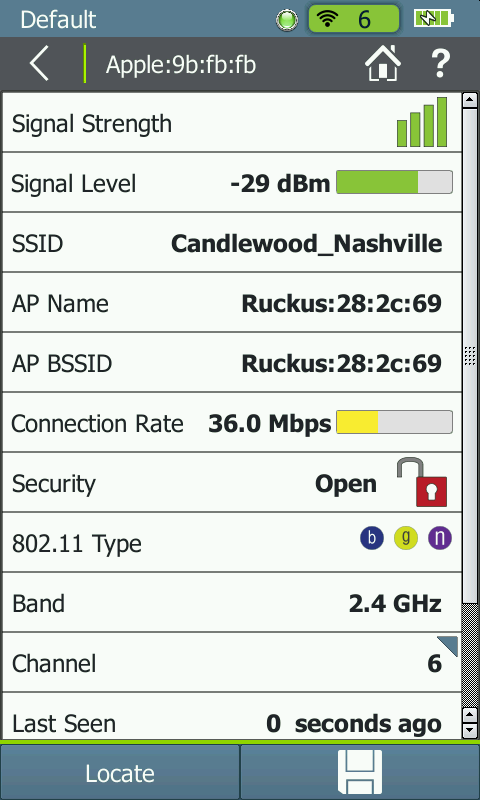
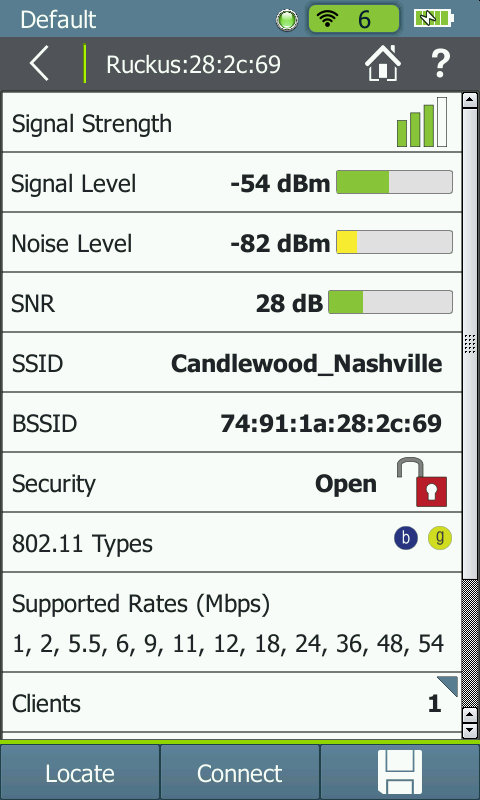
There’s so much to this one! I’ve added a couple of screenshots below to give you an idea of the type of info that you’ll be able to see.
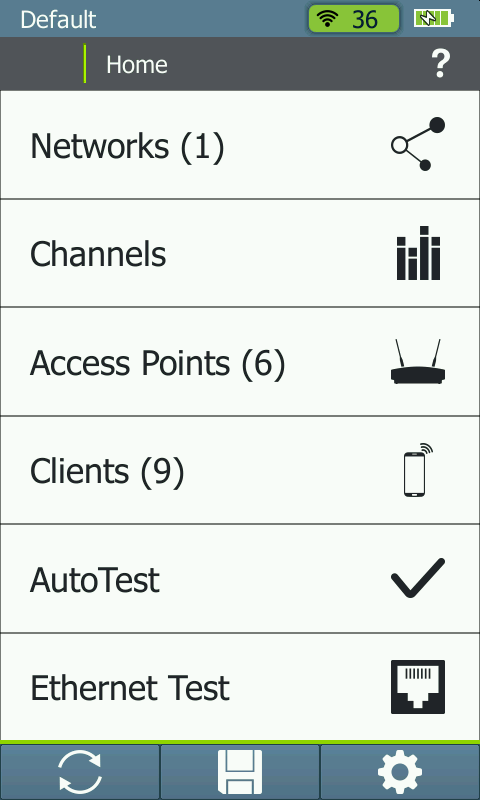
From the home screen, select Access Points or Clients, and then select your AP or Client of interest.
Below you can see some of the details offered on each of the screens. There are more details, but I couldn’t scroll the screenshot on the device to catch them all.
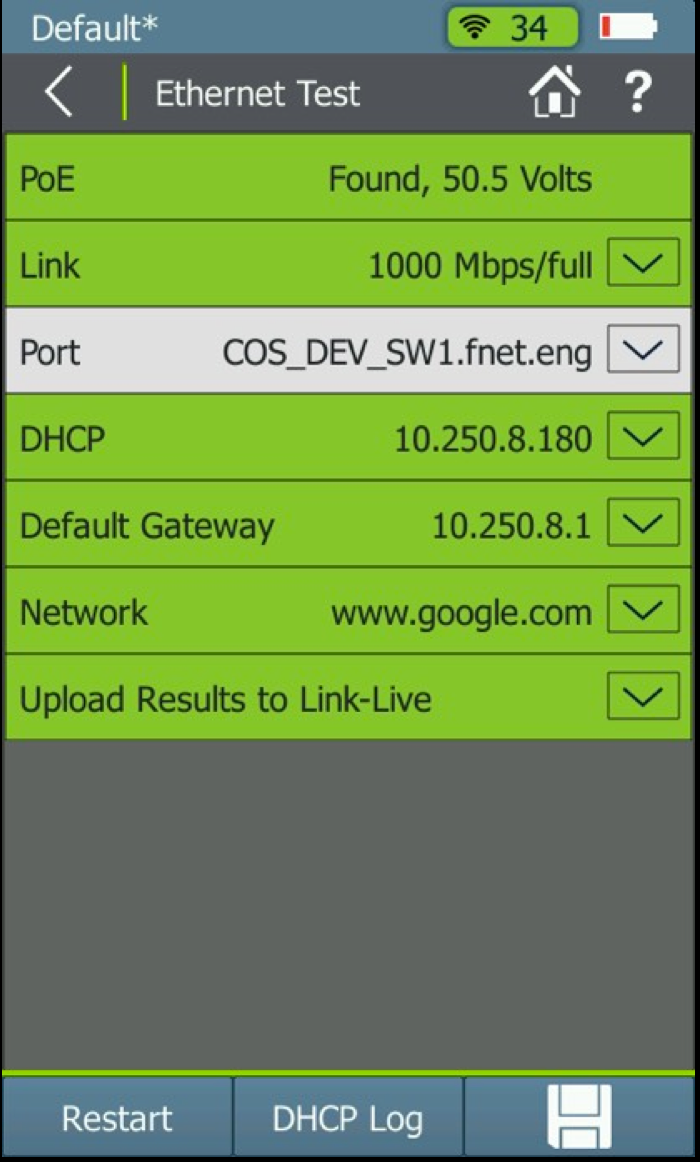
3. Integrated LinkSprinter (Ethernet Test) functionality
The G2 essentially has LinkSprinter functionality built right in. Brain-dead simple to use. That’s value right there! From the home screen, click on Ethernet Test.
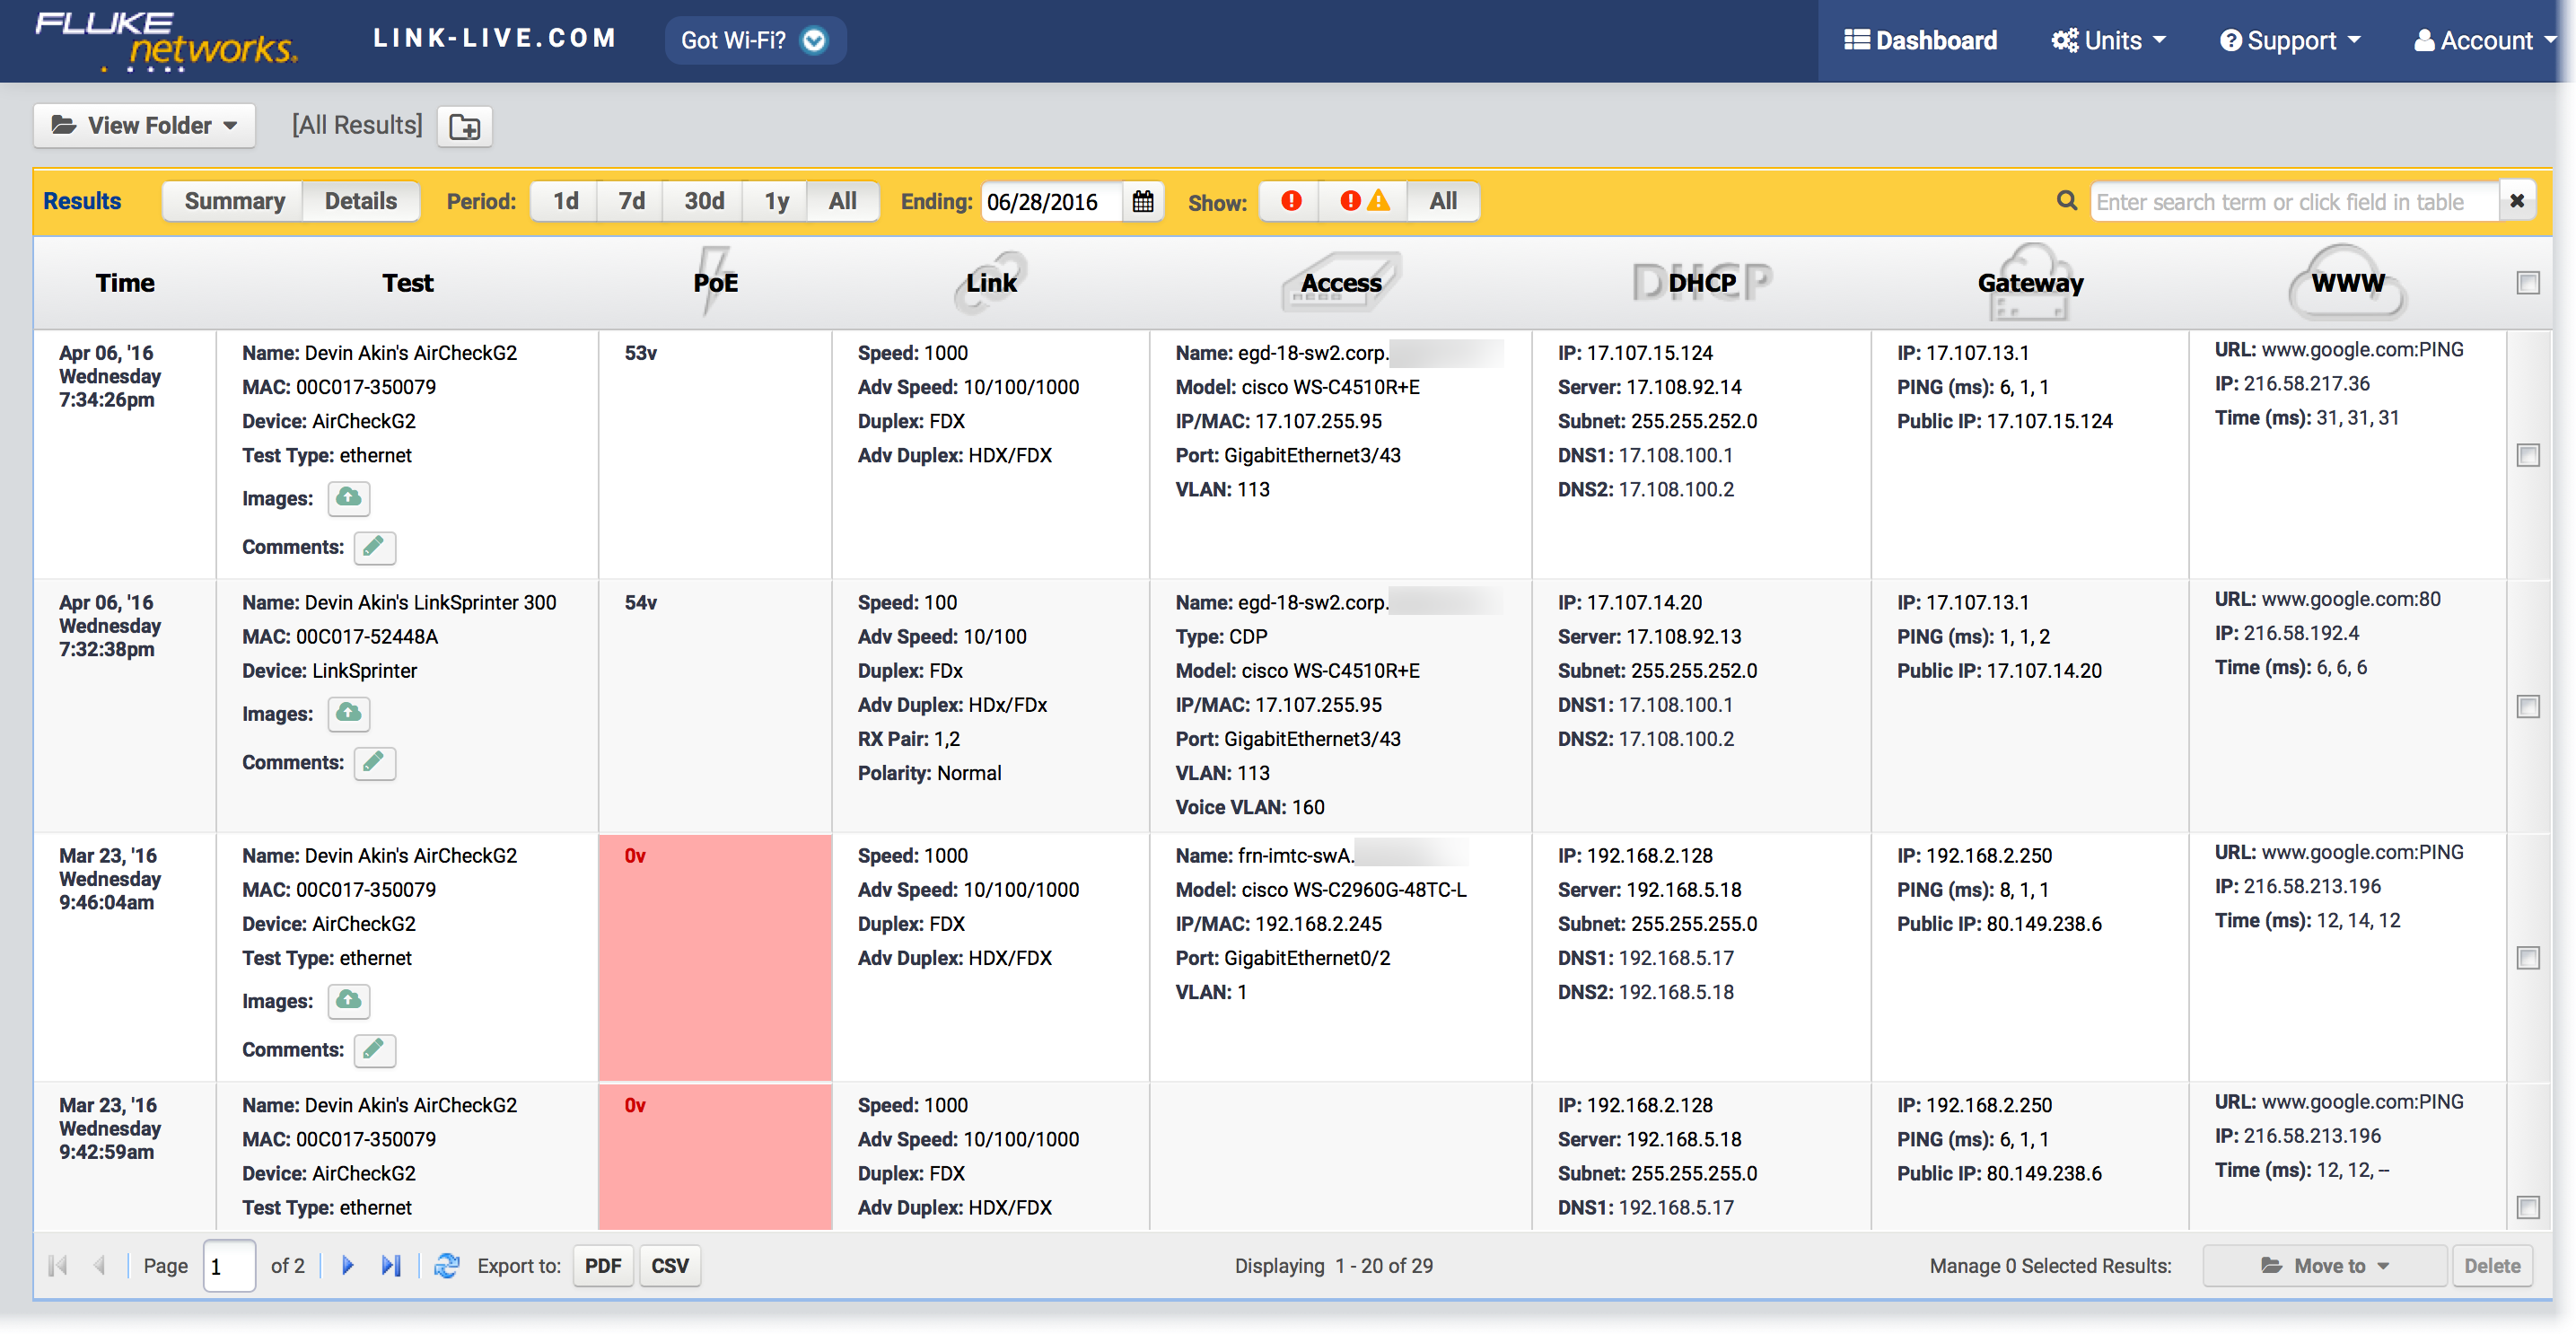
The Link-Live.com website is nothing short of stellar – and free! Mobile-enabled, supports LinkSprinter, LinkRunner, and AirCheck G2. Collected info is automatically dumped to the Link-Live.com website and super-organized where it’s easy to find and understand everything. It’s an off-the-charts kind of awesome.
A web proxy is available to facilitate Link-Live test result uploads: Settings > Device Settings > Link-Live.
4. Emulate user device RSSI with custom adjustments
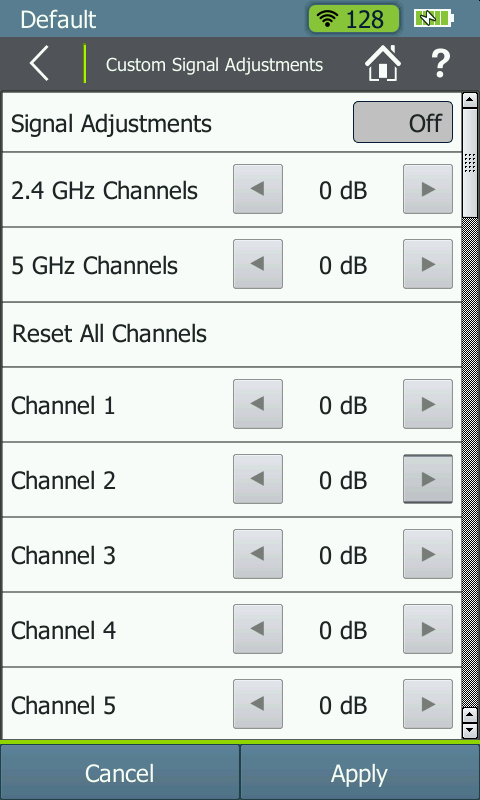
I absolutely LOVE this feature! With it, I can emulate/match any device’s RSSI. SWEET!
Go to Settings > 802.11 Settings > Custom Signal Adjustments
As info:
- Adjustments apply to signal levels but not to noise and SNR levels.
- Adjustments are applied everywhere except the Locate AP / Client screens.
- Adjusted signal levels are shown with an * indicator:
5. Locate device
From the home screen, select Access Point, then a particular AP, then click the Locate button at the bottom.
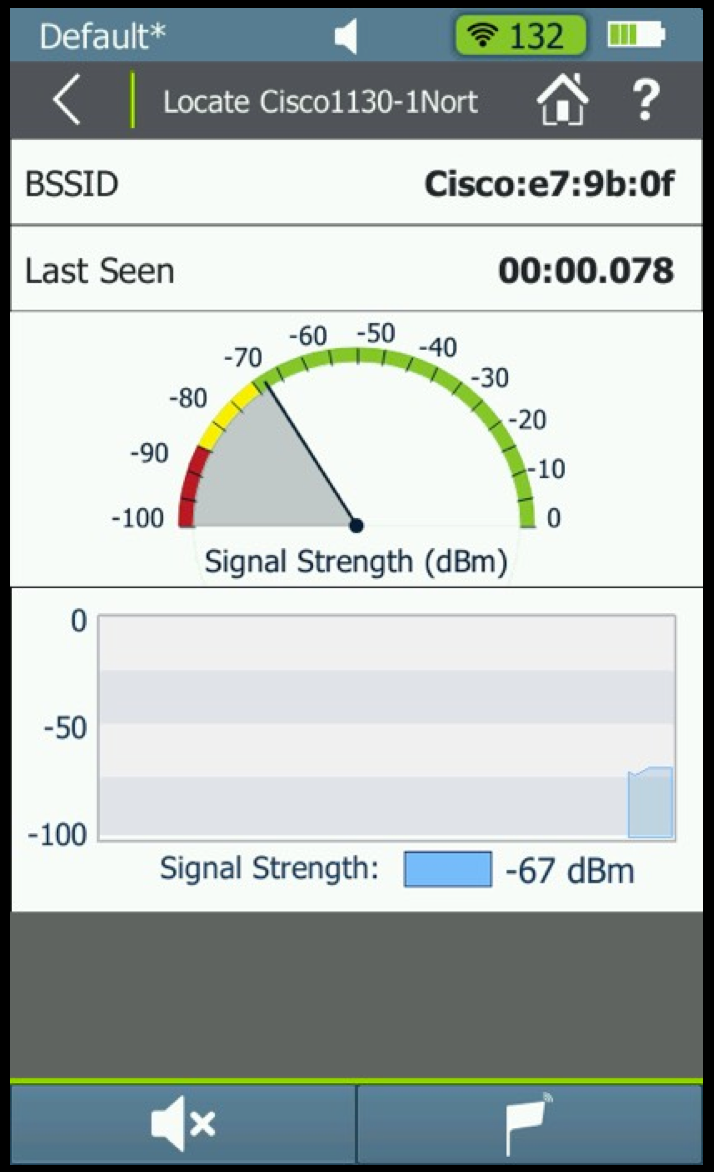
You can have audible beeping (and can even plug in a USB headset so that you won’t bother anyone when finding APs!), and you can use the included external directional antenna for added directionality during AP (device) finding.
6. Desktop Viewing via VNC
Connect your G2 to your local Ethernet network, and then download and install a VNC Viewer (e.g. Tight VNC). On the G2, go to Settings > Device Settings > Remote User Interface > Apply. An IP address will show up on the display. Launch your VNC Viewer application, and enter the G2’s IP address in the Remote Host field. Hit Connect. You should then see the G2 UI on your computer screen.
Note: Running the Ethernet Test function on the G2 during a VNC session will break the VNC session.
7. Screenshot and Save-to-USB capabilities
Taking a screenshot is super simple, and extremely useful. It makes visually capturing “periodic happenings” much easier. You know what they say: “Pcaps or it didn’t happen.“, so save those sessions!
While you can easily use the excellent desktop software to cut/paste screenshots and session info off the device, session and screen capture files can now be saved directly to a USB drive. Just hold down the ? symbol at the top-right of the screen to take a screenshot, and then go to:
- Settings > Manage Files > Session Files > Screenshot Files.
- Click on “Save to USB” button at the bottom of the screen.
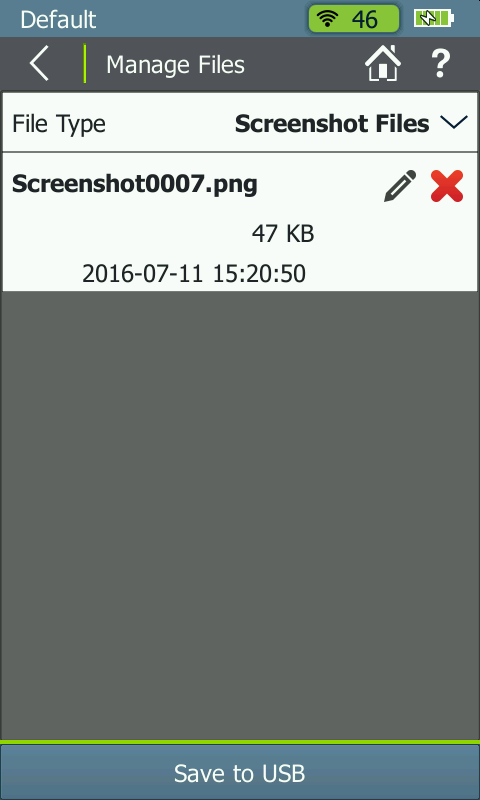
NOTE: Use standard FAT format for your USB drive, and you can use either of the standard USB ports. The drive auto-mounts and dismounts when you plug/unplug it. Awesome!
Of course there are others…too many to count in fact. These are the ones that I use so much that I just had to talk about them. 🙂 Feel free to leave comments about your favorite features of the AirCheck G2!
Dear Devin,
I’m not sure if I fully understand point 4 “Emulate user device RSSI with custom adjustments”. Sure, it’s a good thing for the simulation of receiving signals, but I miss a counterpart for transmitting signals. I remember that you have advised to limit the transmit power of access points to 12 dBm to 14 dBm, in order to balance them with the capabilities of mobile devices.
From a technician I got the information that AirCheck G2 always sends with 20 dBm. Thus, for example, it can not simulate an iPhone to test its Wifi quality on the access point.
Do I miss something here?